A financial intermediary with its own ComplySwiss account can connect to one Fachstelle at a time. An authorized admin on either side opens Connections to start the process; the other side must accept before access is granted. Confirm the administrator email address directly with the other party.
Accept only a Fachstelle you have actually appointed. Once connected, its authorized staff can view and work with the intermediary's customers, screenings, cases and documents.
FINANCIAL INTERMEDIARY
Request a connection from your own account
Open Connections Sign in as an administrator of your intermediary account and open Connections. If you are already connected, the page shows your current Fachstelle instead of the request form.
Send the request In Connect a Fachstelle, enter the administrator email address confirmed by your Fachstelle and select Send request. ComplySwiss emails the Fachstelle without revealing whether an unrelated address has an account.
Wait for their decision Until the Fachstelle accepts, it cannot access your data. The request appears as pending on your Connections page. If you used the wrong address, choose Withdraw request.
Check the active connection After acceptance, Connections shows the Fachstelle and the connection date. Your own account and team remain in place; your organization becomes a mandate in the Fachstelle's organization list.
FACHSTELLE
Invite or approve an intermediary
Open Connections Sign in as a Fachstelle administrator and open Connections. Open requests from intermediaries appear under Pending requests.
Approve a request Check the intermediary's identity and mandate outside the app. Choose Accept to connect or Decline to refuse. Acceptance uses one available mandate place in your plan; if the limit is reached, the request stays pending.
Or send an invitation If the intermediary already has its own ComplySwiss account, enter its administrator email under Invite a mandate and select Send invitation. Do not create a second mandate for the same account. You can withdraw a pending invitation under Sent invitations.
Wait for consent and check the list The intermediary sees the invitation under Invitations and chooses Accept or Decline. Access starts only after acceptance. The account then appears under Connected mandates and in your organization list.
Three everyday connection examples
The illustrations show the sequence for both roles. The intermediary and Fachstelle use their own accounts; access begins only when the receiving side accepts.
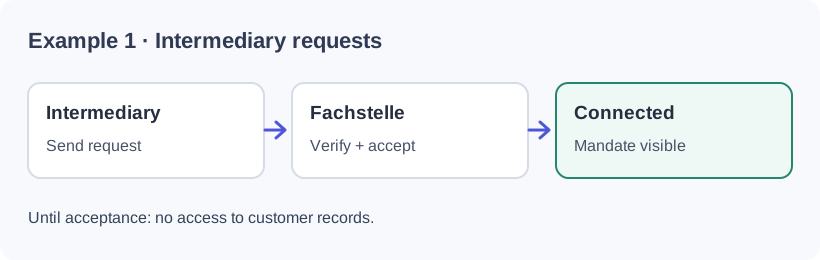
An intermediary requests its Fachstelle
Workflow illustration; not a screenshot.
Example: An independently administered intermediary already has customers in ComplySwiss. Its administrator opens Connections, enters the Fachstelle administrator email confirmed directly by the other party, and clicks Send request. The Fachstelle sees it under Open requests, verifies identity and mandate outside the app, then clicks Accept. Before acceptance it cannot see that intermediary’s customer data.
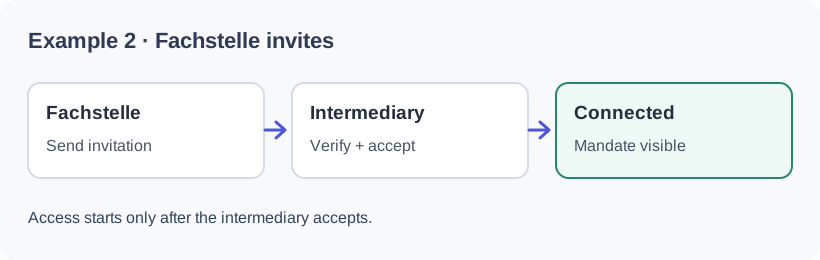
The Fachstelle invites an existing account
Workflow illustration; not a screenshot.
Example: The Fachstelle works with an intermediary that already has its own ComplySwiss account. Its administrator opens Connections → Invite mandate, enters that account’s confirmed administrator email and clicks Send invitation. The intermediary sees it under Invitations and chooses Accept or Decline. Only after acceptance does the account appear as a Connected mandate. Do not create a duplicate organization for that existing account.
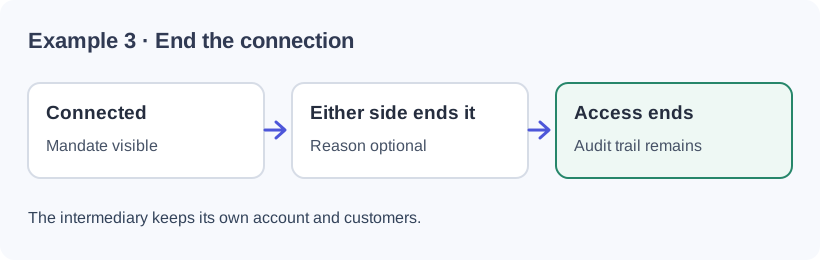
The mandate ends
Workflow illustration; not a screenshot.
Example: When the engagement ends, an authorized administrator ends the active connection under Connections. The Fachstelle loses access to that intermediary’s data; the intermediary retains its own account and customers, and the existing audit trail remains. Reconnecting an independently administered account requires a new accepted request or invitation.
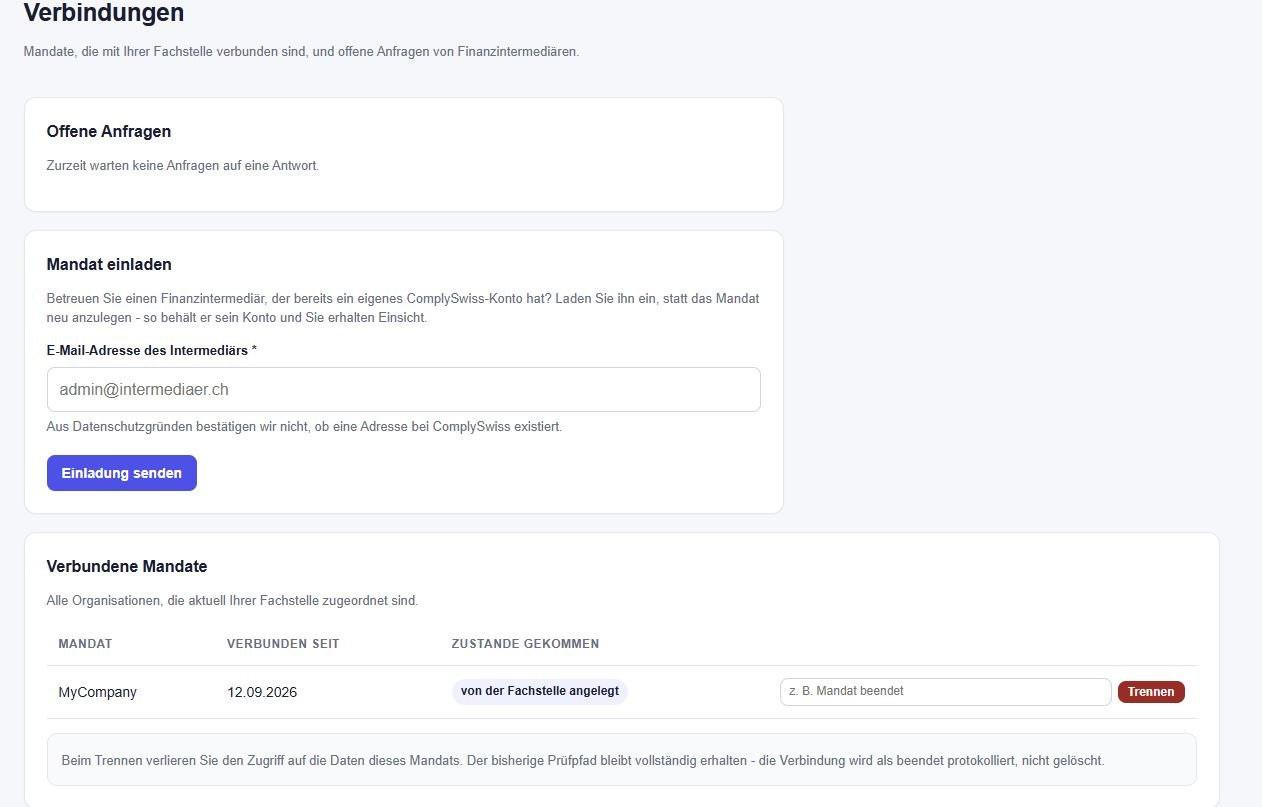
Special case: A mandate created by the Fachstelle under Organizations is linked to that Fachstelle immediately and marked “created by Fachstelle” under Connected mandates. An intermediary with its own account must instead give consent.
Actual Fachstelle screen: Invite mandate and Connected mandates. “MyCompany” was created by the Fachstelle in this test; an independent intermediary account appears only after acceptance.
Working together after connecting
The accounts stay separate. After connecting, authorized users work on the same mandate and see changes in its customer records. The roles below illustrate an agreed workflow; each user needs the appropriate permissions.
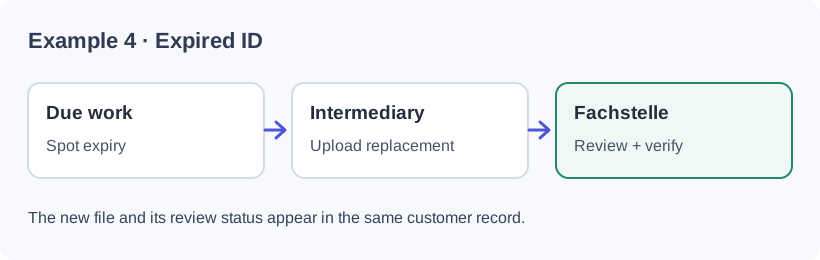
Example: An identity document expires
Workflow illustration; not a screenshot.
In the selected mandate, Reviews → Due work shows an expired or soon-expiring identity document. The intermediary opens the customer, uploads a replacement under Documents and links it to the old file. The Fachstelle selects the same mandate and reviews the new file in the customer record; it can mark it Verified or Rejected. The upload, review status and replacement remain traceable.
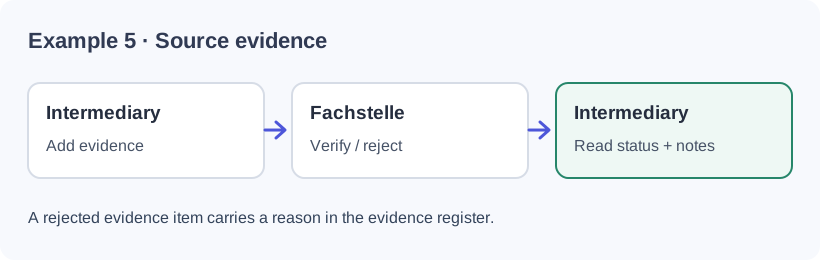
Example: review Source of Funds evidence
Workflow illustration; not a screenshot.
The intermediary adds Source of Funds evidence to the customer under SoF / SoW Evidence, with a description, reference or file. The Fachstelle selects the same mandate and reviews the item. It can choose Verified or Rejected; rejection requires a reason. The intermediary sees the status and review note in the evidence register and can provide missing information.
This cooperation happens through the shared record and documented review statuses. These document and evidence workflows do not provide direct chat or an automatic message to the other side. Agree outside the app who monitors outstanding items.
Practical example: assignment and finding
A connected Fachstelle can open an audit assignment for a mandate. The intermediary documents a response; the Fachstelle reviews and closes the finding.
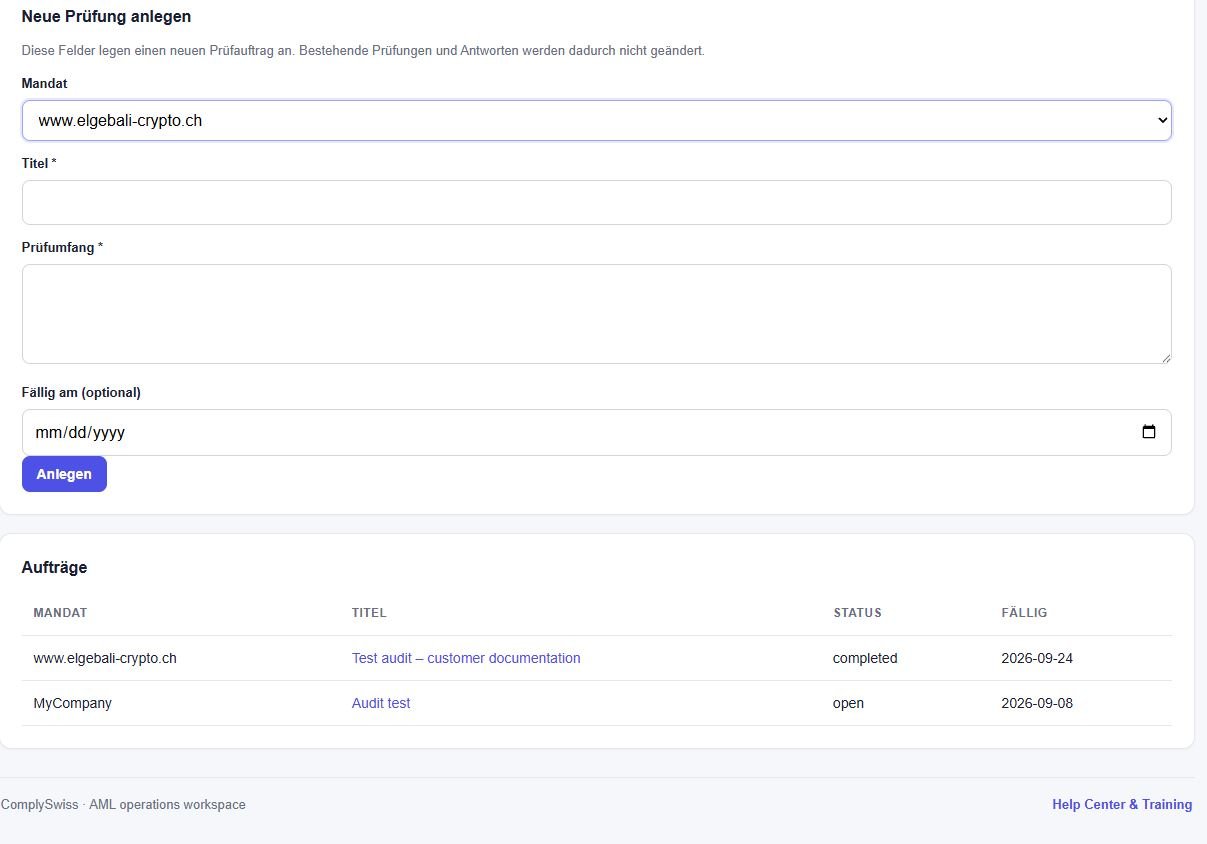
Fachstelle: create the assignment As an authorized Fachstelle administrator, open Fachstelle audits. Under Create a new assignment, select the connected mandate, enter a title and scope, then click Create. Example: title “Test – KYC documents”, scope “Review the test customer’s KYC documents”.
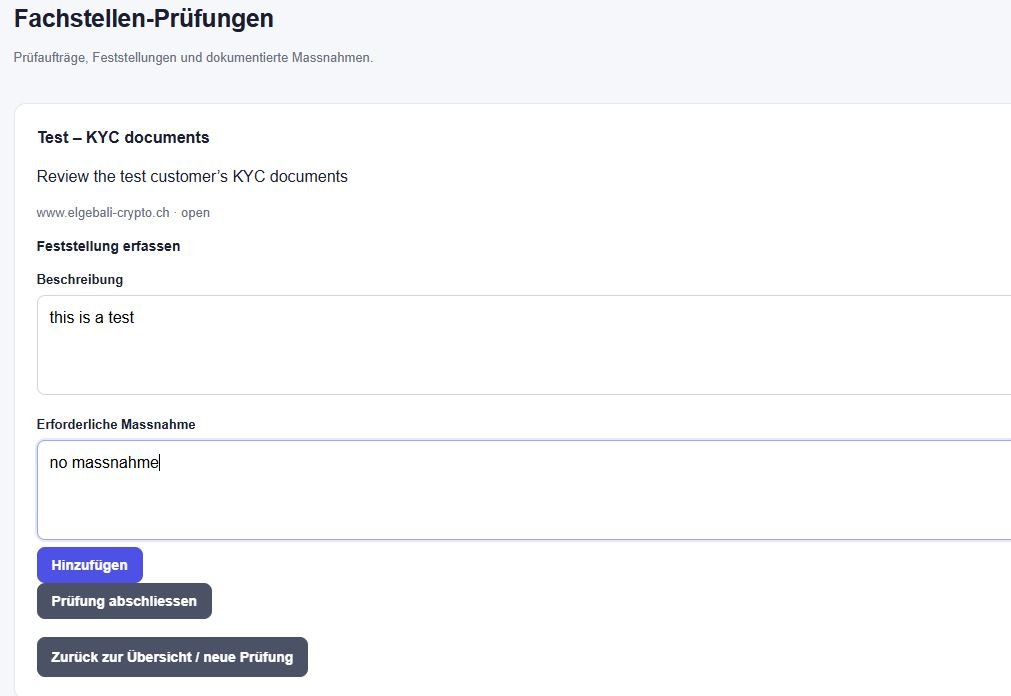
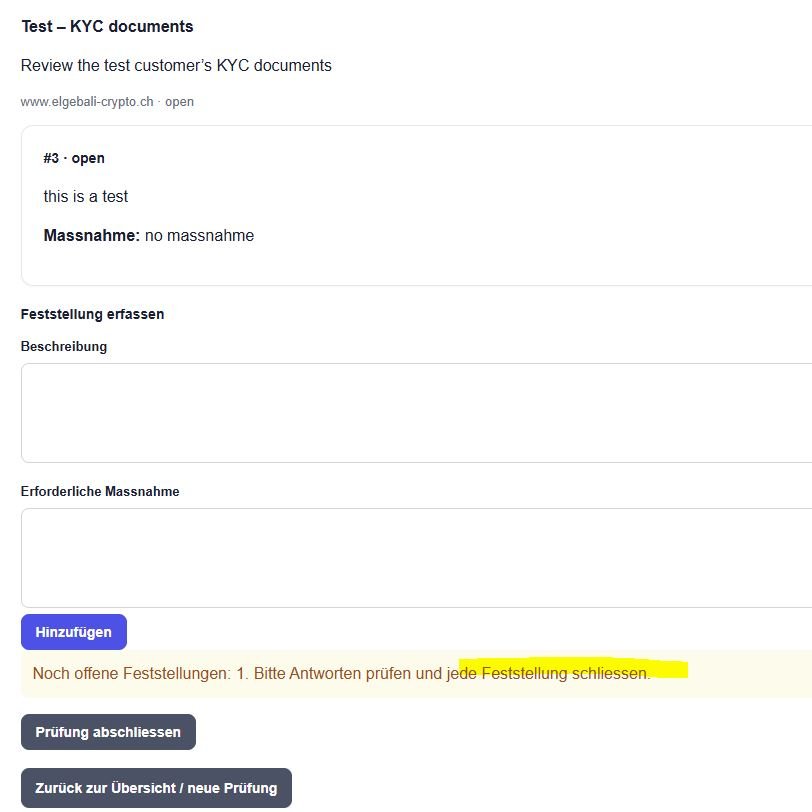
Fachstelle: add a finding Click the title of the new, still open assignment. On its detail page, enter a specific Description and Required action under Add finding, then click Add. Example: description “The test customer’s KYC documents need review”; action “Review the KYC documents and document the result”. A completed assignment cannot receive a new finding.
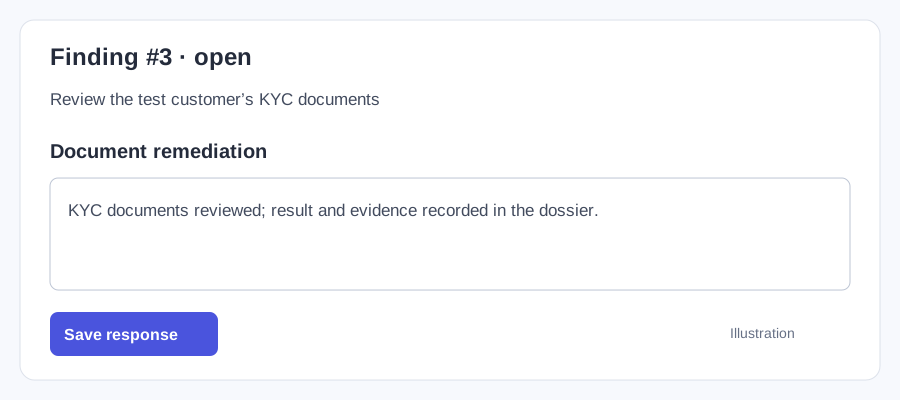
Intermediary: respond Sign in with the intermediary’s separate administrator account, open Fachstelle audits and select the same assignment. For the open finding, enter the actual steps taken and the outcome under Document remediation, then click Save response.
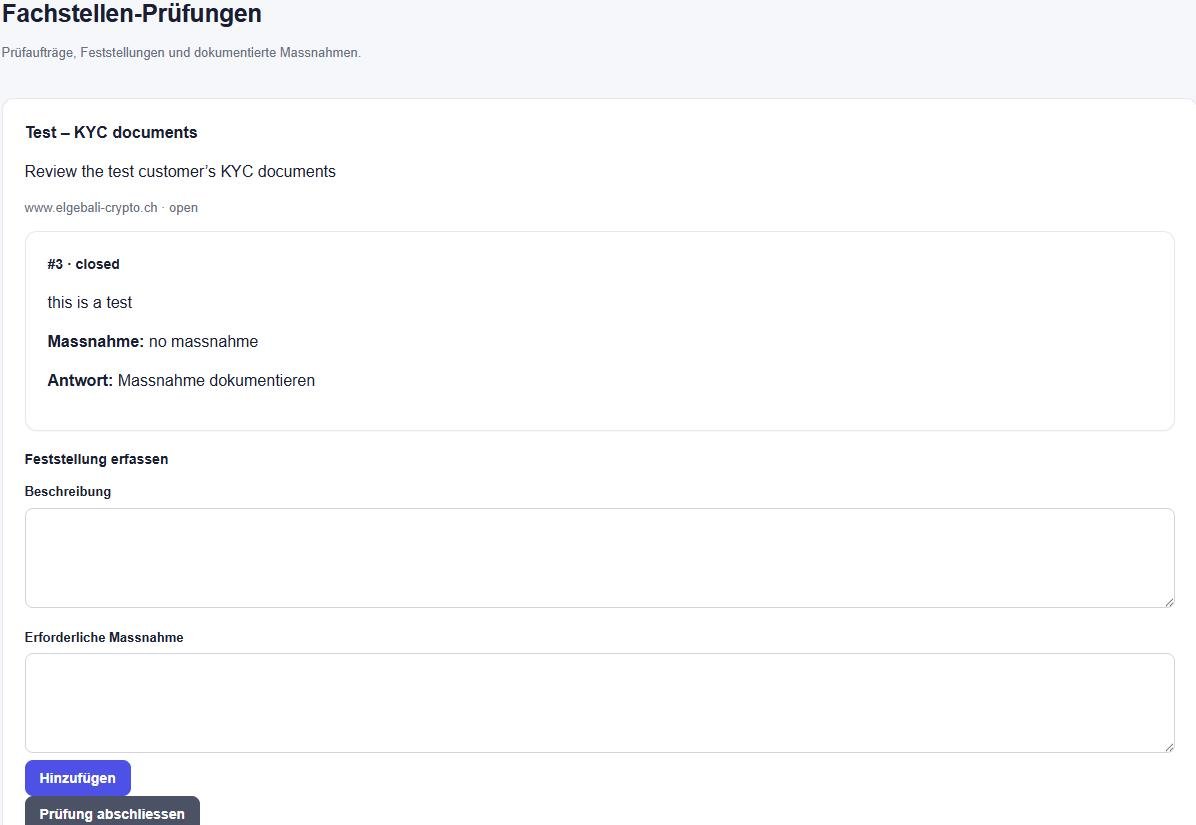
Fachstelle: review and complete Sign back in as the Fachstelle, review the submitted response and, when the action is sufficient, click Close finding. Then click Complete assignment. While a finding remains open, the page shows a warning and the assignment cannot be completed.
The workflow in images
Click an image to enlarge it. The screenshots show test data in the German interface; explanations follow your selected language.
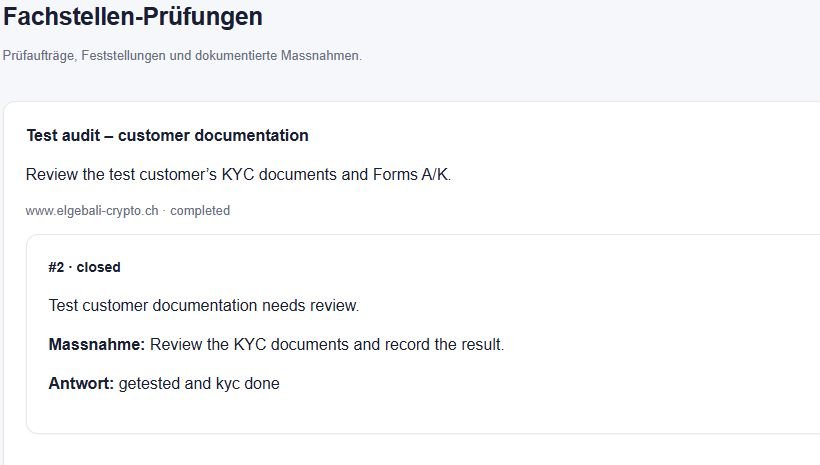
1. Fachstelle: create assignmentSelect the mandate, enter title and scope, then click Create.2. Fachstelle: add findingEnter a description and a concrete action, then click Add. The pictured test entry “no massnahme” is not suitable as a real instruction.3. Finding remains openAfter adding it, the finding appears as open. The warning explains why Complete assignment remains blocked.4. Intermediary: save responseIllustration of the response form: enter the actual steps and outcome, then click Save response.5. Fachstelle: finding closedScreenshot of the current test assignment: finding #3 is closed, but the assignment is still open. “Massnahme dokumentieren” as a response is test text, not evidence of work. After reviewing the response and closing all findings, click Complete assignment.6. Example: completed assignmentScreenshot of a different, already completed test assignment. The current assignment still needs Complete assignment after its finding is closed.
Practice with fictional data. Enter a real required action instead of “no massnahme”; the intermediary sees this instruction. Audit assignments and findings are separate from customer AML cases.
Mandates created by the Fachstelle
A mandate you create in Organizations is linked to your Fachstelle immediately and appears under Connected mandates with the label “Created by Fachstelle.” It is different from an intermediary who already has its own account: that account must request or accept an invitation.
End a connection
Either party can end an active connection under Connections. The Fachstelle selects Disconnect in the mandate row; the intermediary selects End connection for the current Fachstelle. A reason is optional and recorded. The Fachstelle then loses access to that mandate's data, while the previous connection and actions stay in the audit trail. An intermediary's own account and customer records remain.
Disconnecting a live mandate removes the Fachstelle's access immediately. Use a test mandate when practicing this workflow.
Reconnect a mandate created by your Fachstelle
Check whether it qualifies This option is only for a mandate your Fachstelle originally created and later disconnected. It must have no active independent intermediary user and no active link to a Fachstelle. An independent intermediary account needs its administrator's consent through a new request or invitation.
Choose Reconnect As a Fachstelle administrator, open Connections. If an eligible mandate exists, it is listed under Reconnect own mandates. Select Reconnect beside the correct mandate. A free mandate place is required.
Verify the result The mandate returns to Connected mandates. The earlier disconnection stays recorded and a new connection interval is added to the audit trail.
No Reconnect section? It is hidden when there is no eligible detached mandate. An active mandate remains under Connected mandates; an intermediary with its own active users must approve a new request or invitation. Do not disconnect a real mandate merely to make this button appear.
Plan limits and controls
A connected mandate counts against the Fachstelle's mandate limit. While connected, its screenings use the Fachstelle's shared screening allowance; customer and team limits follow the controlling subscription. If the Fachstelle has segregation of duties enabled, the same person cannot create and close a case.
If something does not appear
Check that you are signed in with an administrator role allowed to manage organizations. Confirm the other party's administrator email address directly. A full mandate allowance prevents acceptance but leaves the request pending. The Reconnect section is shown only for eligible detached mandates created by your Fachstelle.
Training note: use fictional or test data when practising. This guide explains the software workflow and does not replace legal advice, SRO guidance or professional compliance judgement.